Disclaimer: This guide provides information for people wishing to set-up and wind their antique clock. However, if at any point you are unsure how to proceed then consult a clock restorer. Antique clocks are easily damaged by mishandling, so be cautious and seek the help of a professional if necessary. Mayfair Gallery is not liable for any damages caused by trying to set up, wind or fix an antique clock.
Mayfair Gallery's antique clocks
We have a variety of antique clocks in our collection at Mayfair Gallery. These include small, easily portable pocket watches, table and carriage clocks, and larger, more elaborate mantel and grandfather clocks which are designed to be the focal point of an interior. The antique clocks in our collection are valuable not only for their beautiful cases, but also for their highly intricate movements (mechanisms).
The clocks in our gallery are cared for by a specialist clock restorer called James Eldridge. James is responsible for getting the clocks in working condition, ready to send out to their new owners. We interviewed James to find out how customers should set-up and maintain their clocks at home.
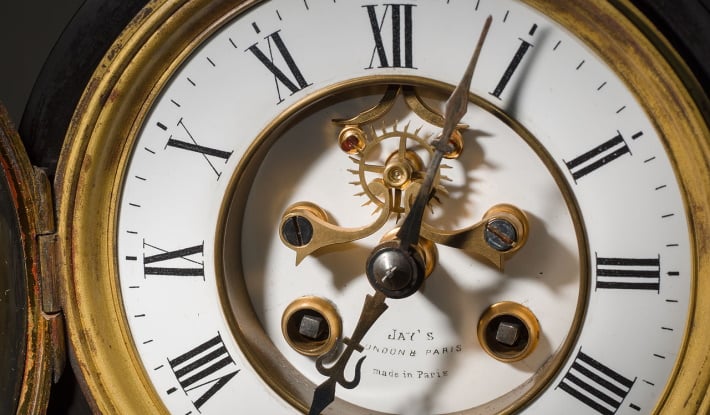
This guide is based on a mantel clock with a 19th-Century French round movement, typical of many Mayfair Gallery models. These are known as ‘Pendule de Paris’ (‘clock of Paris’). Such movements were highly advanced in the 19th Century, and are now wonderful antiques of the period.
If the clock you own is more complicated than this model—if it’s a tiny table clock, a mantel clock with a ‘cercle tournant’ (rotating) dial, or a large longcase clock, for instance—then we advise that you consult a specialist rather than attempt to work or fix the clock yourself. It’s often best to arrange for a restorer to visit your home to set-up the clock in-situ, since moving it will unsettle it and may cause serious damage.
How do I attach the pendulum to the clock movement?
At Mayfair Gallery, we pack the clock case and pendulum separately when we send it. If we sent the pendulum in place, it would move around in transit and cause damage.
To attach the pendulum to the clock, follow the instructions below:
-
Make sure your clock is placed in situ before you set it up because if you move it, it will offset the ticker. You must also make sure that you place the clock on a completely flat surface because if it is uneven, then that will also offset the ticker.
-
Open the back of the case. You can do this by simply pulling open the hinged door.
-
Remove the bell (the round metal feature) by carefully unscrewing the nut that keeps it in place.

James is pictured unscrewing the bell from its post on the back of the movement.
-
Carefully move the pendulum so it is inside of the case and hook it onto the catch (also referred to as a suspension). This catch can either be a loop of string (called a silk suspension) or a piece of metal (called a metal suspension).

The pendulum is directed under and up into the clock case to hook onto the suspension.

Here is a close-up photograph of the pendulum being hooked onto the metal suspension.
Once you’ve got the pendulum in place, move your ear close to the clock and listen to see if the tick is even.
If it’s not, then that means the pendulum is not correctly balanced in the space. It will only hang properly if the clock is positioned on a flat surface—so check this first.
If it’s flat but still not ticking evenly, then follow the below instructions:
-
Use a tool to gently loosen the screws at the back of the case, which are there to keep the movement in place.
-
Now carefully hold the front of outer rim of the movement on the front of the case and slowly twist it (in either direction).

James is pictured here gently loosening the screws that hold the movement in place. With his free hand, he holds onto the dial of the clock.
However, some mantel clocks have fixed movements—that is, they cannot be rotated to adjust the pendulum.
If these clocks have an uneven tick (and it’s on a flat surface), then you’ll have to either adjust the feet (these are often screwed on) or by placing cotton wool pads under those on one side to make the clock level.
This process is just about altering the level slightly and listening closely to see if it improves or worsens the rhythm of the tick.

This clock is an example of a fixed movement—that is, the movement cannot be turned because it is firmly secured in the case. Note, in this movement, the pendulum hooks onto a string suspension, rather than a metal one.
The pendulum is missing. How do I know what size replacement I need?
You’ll often find a number or two on the clock movement. These numbers refer to the length of the pendulum. For instance, in this image the numbers ‘6.9’ correspond with the length of the clock’s pendulum, which is 6.9 inches.

The numbers ‘69’ on this movement record that the length of its pendulum should be 6.9 inches.

James measures the length of the clock’s pendulum to confirm that it is 6.9 inches long, as recorded on the movement.
Often when a clock isn’t ticking, it’s because it hasn’t been wound up. To do this, follow these simple instructions:
-
The dial of a clock is composed of two elements: the left side which is the ‘striking side’, and the right side which is the ‘going side’. That is, the left is responsible for making the bell ring every hour and half hour (30 mins), and the right for getting the clock ticking.
-
There should be two keyholes on the dial – one on the left ‘striking side’ and one on the right ‘going side’.
-
You will need to insert your key into both and gently turn it to the right, until it is fully wound.

James uses a key to gently wind the clock on both its ‘striking’ and ‘going’ side. Here, James is pictured winding up the ‘going’ (right) side.
-
You can then test to see if the clock is working by gently moving the minute hand forwards (aka clockwise)* to the half hour (30 minute) point—where the bell should ring once—and the hour point, where the bell should ring according to the number it lands on (e.g. twice for two o’clock).
-
*Please note, you should never turn the hands backwards (aka counter-clockwise) because this can damage the movement.
Most of the clocks that we sell at Mayfair Gallery are seven-day movements. This means they will need to be wound at least once a week to keep them ticking.
What do I do if my clock chime is off?
This is if the clock is chiming twice or more at half past and chiming once only on the hours. Move the minute hand quickly past the next striking position and on to the strike after. This should put the half hour and hourly strike back in synchronisation.
If the clock is striking the wrong number of times for the hour, simply move the hour hand to the number the bell has just struck.
Remember, always gently move the clock hands forwards and never backwards.
How do I oil the movement of the clock?
Generally speaking, you should leave this to a clock restorer.
However, if you’ve been told to go ahead and put oil on the movement, then follow the below instructions:
-
Don’t use ordinary oil for this- it needs to be a specific type of refined clock oil. If you use any old oil, it will go sticky over time and clog up the movement.
-
Once you have the specialised clock oil, use a tool to apply a tiny drop to each of the pivots in the back of the movement.

Here, James uses a special instrument to apply tiny drops of oil onto the pivots in the back of the movement.
When it comes to setting-up and maintaining an antique clock, it is important to remember to be gentle and patient. Antique clocks are very delicate objects, which need to be handled with great care. If at any point you are unsure what to do, we recommend that you speak to a specialist clock restorer.
We hope that, by following these simple steps, you’ll be able to enjoy your antique clock not only as a beautiful work of decorative art but also as a functional timepiece.
What is that bit called?
See below for an image labelled with the names of the different parts of a French 19th-Century round clock movement.


